Showing posts with label photo. Show all posts
Friday, 4 December 2015
Bits and pieces
The end of
November is when the drama society put on our pantomime (this year it was
Cinderella). This means not much else gets done.Though I
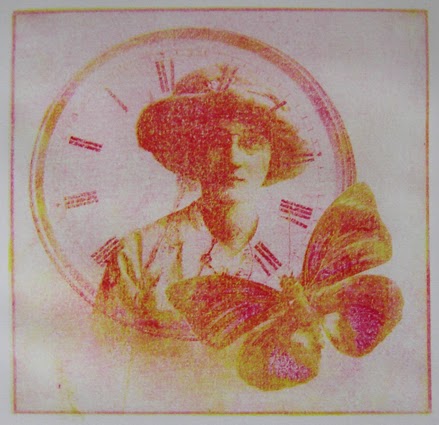
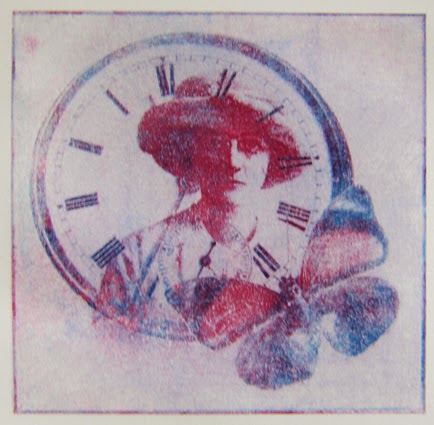
have had another go at CMYK separation gum arabic prints using my own and photoshoped family photographs for the image. The technique seems
to be working but cumulatively the colours are too dark. I think I’ll try the
same images again after Christmas but next time I’ll put quite a bit more
extender in the ink to make it more transparent.
Saturday, 13 June 2015
Gum Arabic Again
In between enjoying a new grandson at home and going to Skye for a very waterlogged week with the old one I somehow
haven’t got round to posting recently.
I’ve been
exploring gum arabic printing further with some larger prints.
(The scanner seems to have leeched all the colour out of the following ones)
(it took a
while to get the pressure right)
And more
colour separations
(this is a
larger better version of earlier experiments)
I‘ve also been
building on the collagraph work I did for ‘Fragments’ and have been designing a
larger, more complicated block which I
hope to print later on this week.
Friday, 5 December 2014
Holes
After
deciding that the bookworm book was the wrong size for the parameters of
the ‘Holes’ swop (Artist Books 3.0) I decided to revisit family photographs again.
When
looking through old photos we usually can recognise Aunty Jean or Cousin Fred but often
in a group there is someone who nobody can identify. I decided to use this idea
of missing identity and take it further by taking the anonymous person out of
the image altogether leaving a hole where they had been.
The images
are all presented in scans of different sized photoframes.
This frame theme continues on the front
and the back of the book
Thursday, 16 October 2014
Colour Separation Continues
I've been trying more gum arabic transfer printing but am having problems producing an edition of predictable uniform prints with three or four different coloured layers. I will persevere because I think it will come with practice but I have decided to also try making 4 colour etchings using the same digital images as the gum arabic prints. (I've only posted one of the images because blogger refuses to accept that the other one is a jpeg and won't use it)
I've produced a set of CMYK separations and used peel n blue to transfer them onto aluminium plate.Before I bite them I need to work into them to stop out any bits where the resist hasn't stuck.
Further progress will probably have to wait until later next week as I'm off the the Manchester Artists Book fair tomorrow.
I've produced a set of CMYK separations and used peel n blue to transfer them onto aluminium plate.Before I bite them I need to work into them to stop out any bits where the resist hasn't stuck.
Further progress will probably have to wait until later next week as I'm off the the Manchester Artists Book fair tomorrow.
Thursday, 25 September 2014
CMYK Almost
I’ve been trying overlaying transfer
printing using CMYK separations.
I don’t have process colours in litho
ink so I’m going with the red, blue and yellow that I’ve got.
I used about 50% extender to try and
make the ink more transparent but I think with these colours I need to use more.
I like the effect of just the red,
yellow and blue. I want to make a few more prints like these before I try
overlaying the final black
Thursday, 18 September 2014
Overprinting
I’ve started to explore overlapping colour. I’ve used the whole image on both layers of some and only parts
of the image on the second layer of others.
The others I'm not as happy with. Being selective with the second layer has possibilities although the areas that have only got one colour of ink look thin in comparison to the rest. I think I would like to try three colours making sure that all areas have at least two colours of ink.
I like these prints where the same image has been repeated in
both colours of ink
The others I'm not as happy with. Being selective with the second layer has possibilities although the areas that have only got one colour of ink look thin in comparison to the rest. I think I would like to try three colours making sure that all areas have at least two colours of ink.
Sunday, 14 September 2014
Gum Arabic Again
I can’t seem to leave the photo album alone. I think I’ve
done all I want to for the time being on transparent images...
but I still keep playing with layering in photoshop.
I’ve decided to explore gum arabic transfer printing with
these images (I’ve done bits in the past but they are a bit hit and miss).
I wanted to persevere with my old mono laser printer to
generate the paper image. In the past I’ve not had much success and have had to
keep going round to the corner shop to use their very old photocopier –it can
end up being very expensive and in winter you can get very wet!
Sunday, 9 February 2014
Transparency
I came
across the acetates I’d made for solar printing the other day. I liked the way
you could see through the clear parts to the image behind.
Starting by
making some smaller inkjet prints on acetate I decided that the ink side of the
print needs protecting. It is susceptible to scratching but also feels slightly
sticky because of the layer of ‘stuff’ on the film that the ink sticks too.
As I started
to arrange and play with the order it occurred to me that if they were thicker
they might resemble the glass plate negatives that some of the original photos
will have been produced on. I cannot print directly onto perspex so I have been
experimenting with layering ink jet prints (on acetate) with other materials to
give a more substantial feel.
Inkjet
transfer print wasn’t successful onto a nonporous surface and using gel medium
to stick the print to a substrate leaves drying marks, the gel is difficult to
spread absolutely evenly and because it is encased between two plastic layers
it doesn’t dry well. Stuck to a flexible material it also peels away, not good
for a book structure
Laminating
the acetate seems to be the most successful method so far. They aren’t as thick
as I’d like but they will stand independently.
I think I can do something with these.
Saturday, 18 January 2014
Exploring Personal Histories
As part of
the experiments I’ve been doing for ‘Personal Histories’ I’ve been scanning
family photographs.
Of course I got carried away; having scanned the pages it was easy to create extra blank frames to add more photos that weren't originally in the album.
I printed it on cheap printer paper in black and white just to see what I could do with it. The images are concertinaed and the end pages glued to the cover. This was just a quick way to explore the idea rather than sewing but I quite like the way it opens out.
My husband
has an old family album. It’s quite small with leather covered wood boards
(very wormy) and it’s not in the best of conditions. It’s probably more
accurate to say that he has bits of a family album. Restoring it is beyond my
skills but I decided to scan the pages and boards and create a digitally printed
facsimile.
Of course I got carried away; having scanned the pages it was easy to create extra blank frames to add more photos that weren't originally in the album.
I printed it on cheap printer paper in black and white just to see what I could do with it. The images are concertinaed and the end pages glued to the cover. This was just a quick way to explore the idea rather than sewing but I quite like the way it opens out.
Wednesday, 11 December 2013
Pondering Personal Histories
I’ve been thinking
about how to start my Personal Histories book.
When I went
on a solar print workshop a few months ago I used old family photos as the basis
for some designs and I want to continue using these as source material for this
project
We all have
a stash somewhere of old photos, some of relatives and friends we recognise and
others who we don’t have a clue about who they are. As time passes they just
become faces. We may know their name, if it is written on the back, but we don’t
know anything about them.
I also think
most families will have a scattering of heroes and villains in amongst the
majority of the ordinary people who make up their ancestry. Their stories may
have been completely fictionalized in the telling and retelling, or just
forgotten over the years.
I want to
combine these two ideas, the hidden stories and the almost anonymous figures.
I’ve decided
base my images on the children’s rhyme “Tinker, tailor, soldier, spy, rich man,
poor man, beggar man, thief”. We’ve probably all got some of these amongst our
antecedents.
I’m not sure
yet what structure to use. You’d think I’d learn from experience and sort this
out first. It would avoid a lot of problems further down the road! However, at the
moment I’m contemplating a series of unbound images jumbled together in a
box/container the same way that the original source photos are kept, although I
also quite like the idea of a frieze of dancing dolls.
This is
Agnes Hall. I decided to divorce her from Thomas.
Tuesday, 3 September 2013
Folding prints
College holidays
have finished. This means that play time has been restricted over the past
couple of weeks. Having managed to ignore it up to now prep for next term has had
to take priority.
However I
have explored monoprinting plants with a rainbow roll and folding to make a
simple structure
I’ve also committed
to making something for Robyn’s Personal Histories Exhibition. I think I’ll play more with the
ancestors photos as a starting point.
Monday, 15 April 2013
Solar Plate Workshop
This weekend I went on a course at the Hot Bed Press. I took
the acetates that I’d prepared earlier.
We were shown how to expose the plates using various UV
exposure units. The plates are then developed in warm water before printing.
But it’s an interesting process that I think I would like to explore more.
My
images were printed intaglio but you can also use the process to create relief
blocks.
I like the idea of being able to manipulate the image
digitally before printing and being able to get a great deal of detail and a
full range of tones from the plate
On the down side you can’t work into the plate to alter and develop
it further. I also had problems with the paper sticking to the surface on some
of my prints althoug I think that would improve with practice. (The emulsion on the
plates also smell foul when its been developed)
But it’s an interesting process that I think I would like to explore more.
Wednesday, 3 April 2013
More from the album
Some of the photos I've scanned are not what you'd call flattering.
They're beginning to bring out my dark side.
Monday, 1 April 2013
Family Album
I’m going to a solar etching workshop at the Hot Bed Press
in a couple of weeks time and I have to take some acetate transparencies to use
to expose the plates. I thought this would be a good opportunity to use some
old family photos that we found whilst sorting out junk a few weeks ago.
I scanned the photos, some objects and printed stuff, took
some photos I thought might be useful and started to layer them in Photoshop.
I just used objects that I thought would fit the spaces but
am finding that I can start to read stories into the images.
I’m not sure if they
will be contrasty enough for the print workshop but I think they may be the starting
point for a book.
Subscribe to:
Posts (Atom)